Saturday, January 4, 2014

12 Crock Pot Meals (with shopping list)

Recipes and "What to write" on each bag included in this post!
Shopping list located at bottom of post

12 Crock Pot meals x 2 (because why do just one when you're already cutting everything already!)) = 24 CROCK POT MEALS

Let me start by saying, I prepared these meals in two days. And when shopping, the purpose behind prepping so many meals together is the ability to shop for bulk amounts of meat or veggies.  When you purchase meat in larger amounts you can save up to 2.00 per pound and that is a great savings!

Day one: Shop and prep raw meat meals
Day two: prep chicken tender meals

Super important - Be organized!!!!!  Shop for what you need.  Try to get only the amounts you need unless you can use the items for meals throughout the week that are not "crock pot" ready.


If you go to the store expecting to remember everything, you won't.  Nobody ever does.  I can easily remember when my sibling made me mad and what it was about, how we each responded to an argument in 1988, but my grocery list . . . well there's an app for that for a reason.


Chop all your veggies at once.  Some blogs I've read said that the person prepped each meal separately and they enjoyed doing that.  Well, goodness they must have an entire week to prepare these things.  I do it over one weekend for the month.  When you cut onions, cut them all. I also prepare and rinse anything like canned black beans, etc. that need to be done for the bag during this time too.  When you start loading up your bags and getting all excited for what these meals are going to taste like . . . well you don't want to stop to cut more onion etc.  I always chop an extra onion, a few more carrots, etc. because I do bowl them all together I never put the "right" amount into the bags.  BUT you'll never taste a difference.


Before you start prepping, first prepare your bags.  Write what meal it is and any directions you need for cooking.  Some recipes call for an item added the morning you put it in the pot and  you should really write that on the bag!  You will forget either to do it, or what amount of the item you are supposed to put in it.  (I have typed out what should be written on each bag, if that helps)

Here is a pic of what our garage freezer looks like right now.  After the meals are frozen flat, I will then move them into a box to have the meals stand straight up and avoid any slipping out of the freezer onto my toes (because that used to happen a lot before I got smart and organized with boxes (literally shoe boxes).  This is after day one, so there are 3 or 4 more types of meals that will be added tomorrow.


So here is what we're making:
Chicken Noodle Soup
Chicken Stuffing
Cilantro Lime Chicken
Beef Stew
Teriyaki Chicken
Mediterranean Pork Chops
Creamy Italian Chicken
Maple Dijon Glazed Chicken
Beef Fajitas
Honey Chicken
Orange Chicken
Chicken Broccoli Alfredo

Chicken Noodle Soup (make 2)
1 1/2 pounds of boneless chicken breast
5 medium carrots sliced
1 medium onion chopped
4 stalks celery sliced
3 cloves of garlic minced
3 T olive oil
1/2 t. thyme
1/2 t. rosemary
3 1/2 T Parsley
2 bay leaves
6 cups Chicken broth
2 cups uncooked egg noodles
1 T. lemon juice

In ziplock bag put all ingredients except chicken broth, egg noodles, and lemon juice.
Write on bag:  Chicken Noodle Soup Low Heat 6 - 7 hours Add 6 cups Chicken broth  Remove chicken to separate into pieces, add noodles 10 minutes before serving.  Add lemon juice and chicken then serve.

Chicken Stuffing (make 2)
4 pieces of boneless chicken breast
1 box stuffing mix
1 can cream of chicken soup
1/2 cup sour cream
1/4 cup water

In Ziplock bag put all ingredients except sour cream.
Write on Bag: Chicken Stuffing Low Heat 6 hours Add 1/2 cup sour cream

Cilantro Lime Chicken (make 2)
2 lbs. chicken
2 limes (juiced and zest of one lime)
1 bunch of cilantro (My husband doesn't like Cilantro too much so one bunch of cilantro is plenty for 2 recipes)
1 bag frozen corn
1 can black beans
2 cloves garlic minced
1 t. cumin
2 cups chicken broth (used only for cooking and then drain when served)

In Ziplock bag put all ingredients except broth (too much liquid is cause for a disaster on your counter when you don't lock it good enough, or worse you don't realize and you put it in your freezer!)
Write on bag:  Cilantro Lime Chicken Low heat for 8 hours Add 2 cups chicken broth

Honey Chicken (make 2)
1 lb. lightly breaded chicken fingers
1 lb. frozen broccoli (I suggest big pieces not the small pieces of frozen broccoli as it will cook down)
3/4 cup honey
1/2 cup soy sauce
1 teaspoon salt
3 tablespoons Olive Oil
1 teaspoon pepper

You don't have to prep this in the freezer as everything you purchase is already frozen.  Plus putting honey into a zip lock bag isn't going to be pretty to get out.  In my freezer, I have the items labeled and together with the other frozen crock pot meals so its an easy grab when it's time to go.

Morning of meal, put all ingredients into the crock pot and cook on low for 4 - 5 hours.   Serve over white rice.

Chicken Broccoli Alfredo (make 2)
1 lb. boneless chicken breasts
1 lb. frozen broccoli (suggest big pieces as they will cook down)
2 jars Alfredo sauce

Again, you do not need to prep this in the freezer.  The morning of the meal, place everything in the crock pot and cook 4 - 6 hours.  SUPER EASY, AND TASTY OVER TOP OF ALFREDO NOODLES!

Orange Chicken (make 2)
3 - 4 boneless chicken in chunks (or purchase small chicken pieces like popcorn chicken, my list includes the popcorn chicken)
**use 1/3 cup flour to flour and brown the chicken in small pieces cool and then place into the zip lock bag**
1/2 teaspoon salt
1 teaspoon balsamic vinegar
3 Tablespoons ketsup
6 oz. frozen OJ concentrate (usually comes in 12 oz container, so half the amount for each bag)
4 Tablespoons brown sugar

In ziplock bag add all ingredients.
Write on bag:  Orange Chicken Cook on low for 5 - 6 hours.  Serve over white rice.

Beef Stew (make 2) **One of my husband's favorites!!!**
2 lbs. Beef Stew Meat
1 teaspoon worchester sauce
1 onion chopped
1/4 cup flour
1 1/2 cup beef broth
4 carrots sliced
3 potatoes in chunks
stalk celery sliced
1 clove garlic
1 teaspoon paprika
1 bayleaf
salt and pepper to taste

In Ziplock bag add all ingredients EXCEPT flour and beef broth.
Write on bag:  Beef Stew Add: 1/2 cup flour to 1 1/2 cups beef broth stir add to pot.  Cook time: low 10 - 12 hours.

Teriyaki Chicken (make 2) I love this one, I add extra pineapple because I love Pineapple!
2 1/2 lbs chicken breast
1/2 cup pineapple juice
1/2 cup soy sauce
1 T. Black pepper
1/3 cup packed brown sugar
2 cups Pineapple chunks

Place all ingredients into zip lock bag.
Write on bag:  Teriyaki Chicken Cook time 4 - 6 hours on low

Mediterranean Pork Chops (make 2)
6 - 8 pork chops (thicker, thin are not meaty enough and might be dry)
1/4 cup olive oil
2 cups chicken broth
4 cloves garlic
2 T paprika
2 T Poultry seasoning
2 teaspoons dried oregano
2 teaspoons basil

Place all ingredients into bag EXCEPT chicken broth.
Write on Bag: Med. Pork Chops Add 2 cups chicken broth Cook time 8 hours on low.

Creamy Italian Chicken (make 2)
4 boneless chicken breasts
1 packet Italian dressing packet
1 can cream of chicken
1 block softened cream cheese

Place all ingredients EXCEPT cream cheese.  Cream cheese should be taken out the night before as the meal thaws to soften.
Write on Bag:  Creamy Italian Chicken Add softened cream cheese Cook time 4 - 6 hours on low Serve over Spaghetti noodles

Maple Dijon Glazed Chicken (make 2) **so yummy**
1 1/2 pound boneless chicken breast
1 cup Dijon mustard
1/2 cup maple syrup
2 T red wine vinegar

Place all ingredients into bag.
Write on Bag: Maple Dijon Glazed Chicken Cook Time low 8 hours Serve with rice or noodles with veg.

Beef Fajita (Make 2) **husband really liked this!  Asked for it again soon)
1 1/2 lb flank steak (cut into pieces)
1 1/2 cup salsa
1/2 sweet onion
**add green and yellow peppers**

Place all ingredients into bag.
Write on bag:  Beef Fajita Cook Time 8 hours low

An extra recipe for those days that we make a bit too much mashed potatoes.

Mashed Potatoes Soup
1/2 lb left over mashed pots
1 cup milk
1 can condensed cream of chicken soup
3 can fulls of water

Put all ingredients into crock pot.  Cook for 2 hours on high.  After 2 hours on high, blend with either a hand mixer or blender.

Serve potato soup and add any "Baked Potato" topping.  Bacon, shredded cheese, sour cream, bits of broccoli, etc.

Shopping List; adjust your list according to what pantry items you have already have.  I make more of the recipes that I have to use up some pantry items (like pineapple since there was a massive sale and I need to use them!)

Meats
14 - 16 pounds of boneless chicken
2 lbs chicken tenders
2 lbs. popcorn chicken
3 lb flank steak
4 lb beef stew meat
10 - 12 thick pork chops

Veggies
18 medium sized carrots
10 stalks of celery (stalk = stick not entire bunch)
4 medium onions
12 - 16 cloves of garlic (depending on size)
bunch of cilantro
4 limes
6 potatoes

Pantry
Gallon size freezer zip lock bags
Olive Oil
balsamic vinegar
16 cups chicken broth
3 cups beef broth
honey
2 packets dry italian seasoning packet
4 cups egg noodles (uncooked)
cumin
bay leaf
paprika
oregano
basil
poultry seasoning
thyme
rosemary

Canned/Jarred
4 cream of chicken
2 black beans
4 jars Alfredo

Frozen
2 bag broccoli
2 bag corn
12 oz. OJ

Refridgerated
Sour Cream
2 blocks cream cheese

DON'T FORGET TO GET FREEZER ZIP LOCK BAGS!!!!!

Tuesday, January 8, 2013

Cleaning in this craziness, one calls a house

We love having people over at our house.  Between my party planner of a daughter and my large family to our friends, our house is normally filled 3 days of the week.  One rule I gave to myself was that I would not clean before guests come over.  Now when I say clean, I mean like a deep clean.  I just don't see the value of vacuuming the carpets just so people can track their dirty feet and shoes through the house.

I do clean, I promise!

I came up with this "Daily Cleaning Schedule" that works really well.  Now I'm the type of person that needs to have a list.  I can check off things off of this "list" when its finished.  So for me, this type of organization works.  For some, they would find this stupid or tedious.  But for my household with 6 bedrooms and 4 bathrooms, this keeps it clean and "presentable" so we can have our family and friends over without thinking I've got mold growing in my toilet and ashamed of its appearance.

So this is what I do:

Daily Cleaning Schedule

Morning
Make beds
Wipe bathroom sink and counters
Empty dishwasher
Laundry into washer

Mid-Day
Chore of the day
Change laundry/fold/put away

Evening
Load dishwasher/run
Wipe down Kitchen counters
Sweep floors
Take care of stair baskets

Chores of the day
Monday:  Kitchen counters and Laundry room
Tuesday:  Clean mirrors and windows
Wednesday:  Toilets and tubs
Thursday:  Mop floors
Friday:  Swing Day

Swing Day Chores
1st - Wipe down cabinets and furniture
2nd - Oven, microwave, and fridge
3rd - Wipe down walls, baseboards, and doors
4th - Spot clean carpets and furniture

Some of these chores are dispersed to my little one as she's three years old going on 15!  Example is the "stair baskets".  These are baskets that I got for FREE when I hosted a Thirty One party with a friend close by.

 
The system that works in our house is that these baskets sit on my stairs.  Throughout the day if I'm cleaning or picking up clutter that has been left on the main level I put it in the person's basket that it belongs to.  At the end of the day, on our way up to bed, it is one of our chores that we take this basket to our room and take care of the items properly (instead of making a pile to just collect throughout the week).  Then in the morning, we bring our basket down and place it back on the step for that day.  It works for us, and avoids numerous trips up the steps to take care of small items left behind in our main living areas.

So that is how we keep our place looking "decent".  What do you do in your space?

Thursday, January 3, 2013

Great poses

The other day a close friend asked me what my favorite poses have been with my kids.  Poses as in picture poses.  You see, one thing people can notice of our family is I really enjoy getting pictures taken of my little ones.
We moved to the West Virginia area almost 2 years ago from Northern Virginia where I lived for most of my life, and since moving here we found one of the sweetest and most kind spirited people when a friend suggested Miss Melanie with Three Turtles Photography.  So since meeting Miss Melanie (who by the way runs her own private pre school) we have done my daughter's 3 year old pictures, maternity pics, and my son's infant shots.  Here is a collection of photos that I have loved the most from her shoots.

The first is the time my son was born, 9:25.  It took some time to find a clock that would actually work.  You know, something big enough but won't break with his weight on it or won't hurt him because of spikey pieces all over it.  We ended up finding this one at Kirkland's and its perfect because we now use it in our living room!


One of the things that I love about her work is that she takes some of the best shots in our natural moments.  Our son had colic for a few weeks (thank goodness only a few weeks) and this was during a challenging moment we had during the shoot.


My husband was raised in Detroit, therefore he's a Detroit Tigers fan.  This was a picture that we our son's name on the baseball (which now sits in his bedroom on a stand) "teamed" with his The Detroit Tiger's hat and my husband's baby blanket (that is now my son's blanket).  We ended up using this one on his birth announcements.


Now this one is one of my favorites!  My big belly and our little bean on her tippy toes reaching to give the belly a kiss.  This one we put onto a canvas and hangs in our front room (I'll have to post a picture one day of that room and the pictures as we get a lot of compliments on the setting).


I used this one on cards I had specially made to send thank you notes to some close friends.  This one just captures the natural beauty of being outdoors and pregnancy.


I spent some time in our driveway with my daughter's chalk and got this done right before she came to the house.  I loved the outcome!  I did try a shot with me laying down "holding" the balloons but I looked like a beached whale, it wasn't cute!  ha ha


 Finally this is a shot of my daughter just being her joyful self laughing, and Miss Melanie always catches great things!


So bottom line, in answering my friend's question, some of my favorite shots are both naturally taken and slightly posed.  The ones I do love the most are ones that Miss Melanie took and that capture the true meaning of each member of our family in our moments.

Wednesday, January 2, 2013

Learning letters

Sometimes my wonderful husband comes home from work and says "What did you do today?"  And although to some stay at home moms (SAHM) they would find this really demeaning (that has only happened once to me) my husband knows we're always busy with something fun, creative, and a learning opportunity.

Since our oldest is now 3 1/2 we're working on letters, in so many different ways  And with all 3 year olds, my daughter strives for hands on activities.  Manipulatives are much needed in our learning activities!

Today I used one of the Leap Frog's Letter Factory tools to help out.


Two minutes of prep work, and at least 30 - 45 minutes of fun and learning!

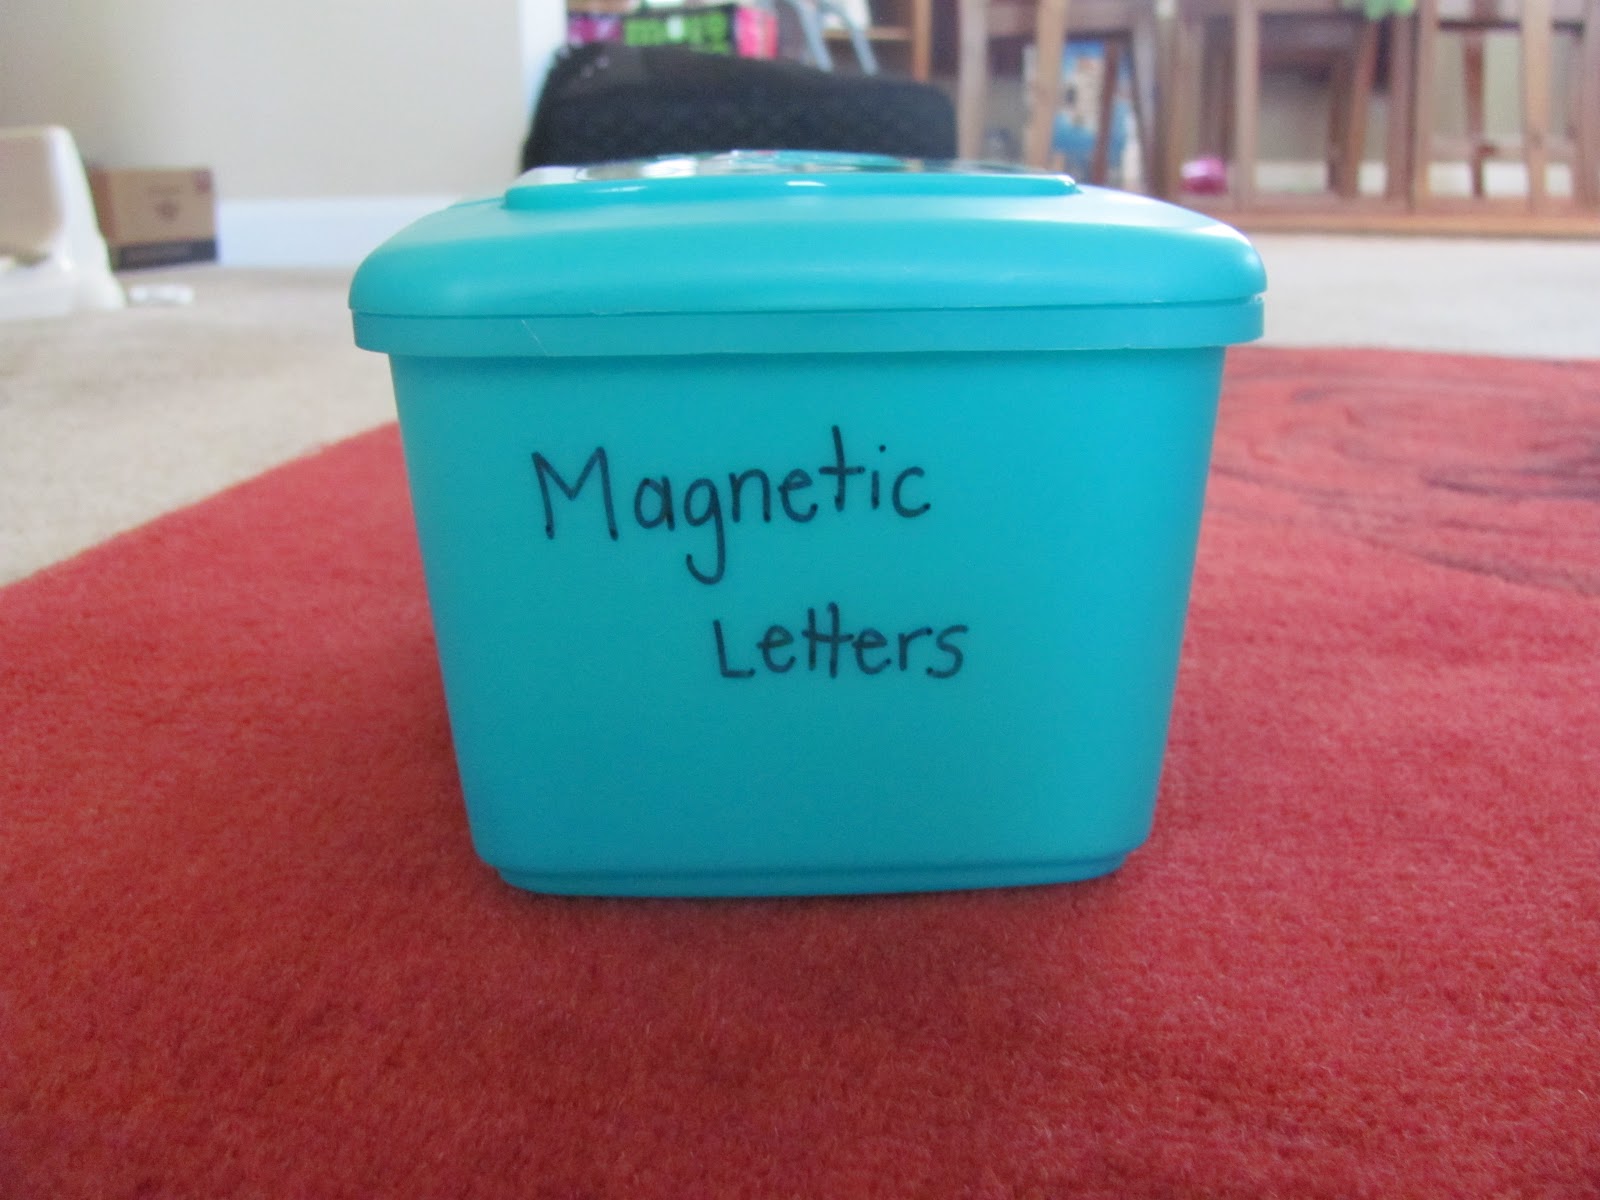
**side note**  I reuse old wipee containers, wash them out, and label them with everything from toy cars, My Little Ponies, and obviously our magnetic letters.  It's the best way to keep track of all those pieces without losing a letter or having a disaster all over my house.  I keep them organized on a shelf.  Our system works great as we've taught her how to care for them.  Now the challenge is to teach our visiting friends to learn the same concept so I don't spend an afternoon after a play date reorganizing them.


I taped a piece of construction paper onto a metal cookie sheet.  Writing letters with a sharpie on the construction paper.  Then I opened up the box of magnetic letters to have my little one match the letters to each other.


With this activity, when she was done matching I spent time asking more questions to involve more thinking and learning.  Here are some of the questions I asked my little one.

  1. How many blue letters there did you use?  Red?  Yellow?  Green?
  2. Which color has the most letters on the board?
  3. Can you show me a letter that has a curve in the shape?
  4. Can you find the letter "L" and tell me what color it is?  Trace the letter with your finger.
  5. What kind of pattern can we make with our letters?
  6. Can you spell your name with the letters on our board?  If not, what letters are missing?
There are loads of more activities we do with things like this, what do you do with your little one to teach letters?  Colors?  Etc.? 


Monday, December 31, 2012

Snowflakes for Sandy Hook Elementary

I was "clicking" away the other day and came across this page.  Information on how to help with the tragic event that took place at Sandy Hook Elementary.  As an Elementary Education major (fully using it as a stay at home mom now!) and with a husband that teaches 4th grade tragedies like these hit home for us.  A lot of emotions run through.  I had recently been thinking about a way to show our little 3 year old how to encourage and support those affected this day.  I think I've found the perfect way!

Snow flakes for Sandy Hook Elementary!  You see, if its a craft, its right up my little one's alley!!!  A girl with her Mommy's loves!

Need ideas for some really cool looking snowflakes?  Check out Taming the Goblin's Paper snowflake pattern round up ideas.  Or release the inner geek with Anthony Herrera's Star Wars Snowflakes.  Or even joybx.com I found these awesome patterns.

After making your awesome creations, mail them away to:


Connecticut PTSA by January 12th

Connecticut PTSA
60 Connolly Parkway
Building 12, Suite 103
Hamden, CT 06514

I'm sure everyone is DYING to see our creations!  Here are just a few.  One great idea is to use different kinds of paper!  (we used anything from cupcake liners, scrapbooking paper, store ads (those colors look awesome as a flake!), construction paper, and obviously white printer paper.


Now go ahead, make your flakes and mail them away!

Friday, December 28, 2012

What to do with all those Holiday Gift Cards?

Prayer Sticks


If your family is like ours, we receive a LOAD of Christmas cards in the mail.  My daughter just loves getting any form of mail, and when there are pictures of those that sent it, well it just makes it that much more special!

During the Christmas season, we received an abundance of holiday cards with family photos on them.  I know we usually send them out to all of our family and friends (this year I just ran out of time!).  Am I the only one that struggles with throwing them out?  I look at the card and those beautiful pictures and I think . . .  "How can I put that in the trash?"

So here is an idea of what you can do.  Collect these simple items:  Sharpie marker, Popsicle sticks, scissors ( i know they are not pictured) and tape.


Now cut out the picture of the person/family/pet that you want to save.  Place the picture face down, put the popsicle stick against the picture, and securely tape it together.  Then use the Sharpie marker to write the name of the person on the stick.


Then TADA, you now have prayer sticks.  We will be using these at night so our little one can recognize the faces of family and friends afar as well as use it as a learning opportunity in letter recognition as we say the letters of their name out loud together.


Best part about these little guys is that our 3 year old (who desperately needs something tangible in order to understand a concept) is learning how to pray for someone that she visually sees.  I know when we see these loved ones in person throughout the year she'll be able to recognize them more . . . maybe even lose this shyness that is present in the first 10 minutes of seeing someone.

Enjoy!

What do you do with your Holiday Picture Cards?

Tuesday, December 11, 2012

Jolly Rancher Pops

Who doesn't love a jolly rancher?   Well of course, pinterest did it again when I saw these adorable lollipops and knew my daughter would LOVE to make them!


Preheat oven to 225 degrees.  Cover a cookie sheet with parchment paper.  Open your flavors of jolly ranchers


Put lollipop sticks on top of the three pieces of candy down the center.


Bake for 3 - 5 minutes and check how they're doing.  

**UPDATE**  After 2 minutes place one jolly rancher length wise on the stick on to help melt the lollipop together.  Bake for 3 - 4 more minutes.


Sunday, September 16, 2012

PINTERESTing Party

We've all heard of and are most likely participating (if you're a lady in touch with the electronic world at least) of the wonderful site Pinterest!  We all "pin" these wonderful ideas of projects, food items, word creations, and well basically everything!  Usually we as women are just looking for a reason to make one of these creations and I've found a way!

You're invited to a "PINTERESTing Party"

Who:  Any person you want to invite and have a wonderful time trying recipes and making a project.

What:  Each person invited will make a Pinterest inspired recipe.  Something they saw on the site that they're looking forward to making, print off the recipe and attach it to a recipe card.   AND have a craft ready to prepare.  (idea:  each person can bring something toward the craft that is needed).  LASTLY, if the people invited have created a craft from the site, they can bring it along to share!

Where:  Wherever you want to hold it.

Why:  I think we already discussed this :)

How to make it work:

Lay your food out.  Once people arrive and its time to eat, allow each person to talk about what they made and the difficulty in it or anything else they want to share.


This is a picture of a wonderful centerpiece one of the ladies made. I love the organicness of it!


While sitting around snacking on the wonderful food creations, share one of the inspired craft projects that people brought to show off.  This is a great time to get inspired and even make a craft that interests you.

Finally when it is the host's turn to share what she brought (I went last) showcase the craft that you will be making.  We made these awesome Coasters.  Since the party went longer than expected, that last stage of spraying on acrylic had to get done and dry which gave me the chance to put them together in a cute way.


Do you love the idea?  Do you want to try it yourself?  What are some ways that you would change it or improve it?  I love making things better!

Sunday, April 29, 2012

Family Hand Picture


Family Hand Picture

This was one of the first "pins" I decided to do and found it here: http://father.tipjunkie.com/framed-family-handprints-crafts-for-fathers-day/

Original Pin:
Framed Family Handprints {Crafts for Fathers Day}

My adjusted project:


Adjustments made:
  • Instead of using a marker or other utensil to write the name of the family and personalized year, I simply typed it up on the computer and printed it out.
  • I also made a frame around our hand prints with additional scrapbook paper to create a "set in look" instead of purchasing the more expensive double matted frame.
  • For one of the hand prints, I used the "I Love You" symbol. My daughter really loves going to the picture and attempting to make the symbol and she's almost mastered it without having to hold down fingers with the other hand.
Would I do this again?
  • Yes, I think its such a cute addition to our family wall of pictures and as our family grows with #2 arriving in July we'll have to add another hand to it soon. I'll probably take this one out and save it in my daughter's scrapbook so she can remember the special time we spent making it.
I like how you can personalize it and allow each person who has a hand in the picture choose their own scrap book paper or something they want their hand on. I think the next time we do it since my husband enjoys reading so much maybe his hand will be on a page from a book or newspaper and I would have something with baking on the paper, etc. I would need to find a way to make them all collide together and not look like a stampede of craziness.

Enjoy! If you create one, please share a pic. Would LOVE to see it!

Friday, March 30, 2012

Éclair Pie

Éclair Pie


Ingredients:
2 small boxes French Vanilla Pudding
3 cups milk
Tub of Cool Whip (When available use the French Vanilla Cool Whip you'll love it!)
2 sleeves of graham crackers (the honey ones are good to use, but the cinnamon style ones are a bit too much for this recipe)
Icing:
1 cup sugar
1/3 cup cocoa
1/8 teaspoon salt
1/4 cup milk
1/4 cup butter
1 teaspoon vanilla


Beat pudding and milk until it reaches a pudding consistency. Fold in Cool Whip. If you stir or beat in the Cool Whip you will over beat the mixture. Folding in Cool Whip means you will use a spoon or spatula to fold over in a gently manner instead of stirring the mixture.

Place this mixture in the fridge until ready for use to prepare the pie.

In a medium saucepan, mix sugar, cocoa, salt, and milk. Bring just to a boil, stirring constantly. Continue stirring for about 5 minutes. Remove from heat and add butter and vanilla.


This mixture should stay off the heated burner and will be used once the pie is put together. DO NOT REFRIGERATE AS IT WILL SET FASTER.

** Prepare the pie (the next step) in a quick manner as you do not want the chocolate topping to set.**

In a 13 x 9 pan, layer graham crackers, 1/2 the pudding mixture, crackers, other 1/2 of the pudding mixture, and top with crackers.

Pour the chocolate icing over the cake evenly, spread with a spatula if needed. Refrigerate several hours to set. (usually 3)
Instead of making it in the 13 x 9 pan, I made it into a 9 x 9 pan and a smaller pan (The Pampered Chef's 3 1/4 cup glass container) so Darell can have his own extra portions tomorrow. I know he's going to LOVE this!


This picture really doesn't do the Éclair Pie any justice, but trust me . . . its worth the calories! I can't wait for another helping!


Monday, February 13, 2012

Loaded Baked Potato Chowder


For this recipe you have to have The Pampered Chef Deep Covered Baker (DCB).


Keeping with soups for the hubby's tummy, we're doing the Loaded Baked Potato Chowder. This is a Pampered Chef Recipe with the link provided.

Ingredients:

3 baking potatoes (about 2 1/2 lb/1.1 kg)
3 1/2 cups (875 mL) milk, divided
4 oz (125 g) cream cheese, softened
2 tbsp (30 mL) butter
2-3 green onions with tops (1/4 cup/50 mL sliced)
4 oz (125 g) sharp cheddar cheese, grated
1 1/2 tsp (7 mL) salt
1/2 tsp (2 mL) coarsely ground black pepper
Toppings per your liking. Suggestions: Broccoli florets, bacon, sour cream, or think of any items you like on top of your loaded baked potato and have that ready!


Slice potatoes in half lengthwise, arrange into DCB. Pour 1/2 cup of milk over the potatoes. Cover and microwave on high for 11 minutes. Remove the baker from the microwave and move the center potatoes to the ends of baker and the potatoes that were on the edges to the middle. Cover and microwave on high for 8 - 11 minutes. The potatoes should be easily pierced with a fork.


Carefully remove the DCB (use pot holders or something similar! It will be hot!). I used another Pampered Chef tool (Mix and Chop) but you can use any tool you want. Mash the potatoes into a coarse mixture.


In a separate bowl, whisk cream cheese until smooth. Slowly add remaining 3 cups of milk. Whisk until the mixture is smooth with no pieces of cream cheese showing. Add this cream cheese mixture to the DCB. Add butter. Cover DCB and microwave on high for 3 - 5 minutes or until chowder is hot

Carefully remove the DCB from the microwave. Grate cheddar cheese over the chowder, add green onions, and additional salt and pepper to taste.


Now you're ready to put it in your bowl and place your favorite toppings in it!

The toppings we chose were broccoli florets (chopped into smaller pieces), turkey bacon, cheddar cheese, and sour cream. It was awesome!


** Our family drinks Fat Free milk. If you use whole milk or 2 % you will get a bit of a thicker consistency for the chowder as well. **

If you are interested in purchasing the Deep Covered Baker, you can do so here:

Wednesday, September 28, 2011

Chicken Soup

Recipe and pictures submitted by Anita Baker. (My Mom!)

Chicken Soup can cure a soul! There is just something about having fresh homemade Chicken soup on a rainy day, feeling kind of lousy day, or a cold snowy day. Mmm, the smell can just take me away . . .

Chicken Noodle Soup

Ingredients:

1 family size pack of chicken wings
3 bay leaves
1 lb. carrots (cleaned and cut into coin size pieces)
1 Medium sized onion (half to be put in with chicken pieces and other half with the rest of the veggies)
½ stalk celery (cleaned and cut into pieces)
16 – 32 oz. Chicken Stock

Directions:

In a large pot place the bay leaves, chicken (NOT frozen), and ½ onion (medium sized slices) in water so the entire amount of chicken is submerged in the water. Add a teaspoon of salt and 1/2 teaspoon pepper. Allow this to boil.

Boil until the chicken is almost falling off of the bone. When finished remove the chicken and allow to cool on the side. Once cooled, you will shred the chicken from the bone. DO NOT DRAIN THE WATER. YOU WILL USE THIS SAME WATER FOR THE SOUP!!!

While the chicken is cooling add the chopped carrots, ½ stalk celery, small onion into the water. You should allow this to cook until the carrots and celery are tender. Add the Chicken stock. My Mom likes to use only ½ of the box of stock; but my Dad wishes she would use the entire amount. Depends on how much sodium your diet can take. You can always add salt to it when eating. (You tend to use more salt flavoring it yourself when eating so I would suggest using the stock)

When your chicken is done cooking; now is a great time to start boiling that water for the noodles. We do about half the box for an entire pot of soup. If you like more noodles in your soup then do more noodles.
My Mom recommends to leave the noodles on the side because if you plan on saving some for a meal later on; the noodles will absorb all the broth and it will be a dry soup when re-heating. When the noodles are cooked (al dente) drain and ladle broth from the vegetables into the pan on reserve and return the noodles to this.

Once the chicken is cool and you're able to handle it, take the meat from the bone. This will be rather easy to do as the chicken is almost falling off the bone to begin with.

After you have separated the chicken from the bone, you add it directly into the soup pan with the veggies. By this time the carrots and celery are probably tender and ready to eat!


Depending on if you have the noodles on the side or mixed directly with the soup, go ahead and make yourself a bowl! We usually have one ladle of noodles to two ladles of the chicken/veggie mix. Grade a little bit of Parmesan cheese over the top and enjoy!

I was raised eating this soup during the Fall and Winter months. And like all families we have traditions. As crazy as this sounds, we ALWAYS eat this soup with peanut butter bread. Try it out, you’ll LOVE it too. But I am not disappointed if you don’t because my husband thinks we’re absolutely nuts for doing so. I mean it’s not like we’re drinking chocolate milk with fried fish or something!
I made extra soup so I could freeze some and I did so by freezing it in a muffin tin. This muffin tin is the extra large muffins and the perfect size to heat up for Zoe (my toddler) or even two of them for an easy lunch for myself. After they freeze pop them out of the molds and store them in a baggy. You can do this trick with stews in the crockpot or any other soup/chowder that you look forward to having again without the hassle of making an entire batch!